How to draw cords and knots
- David

- Aug 14, 2023
- 3 min read
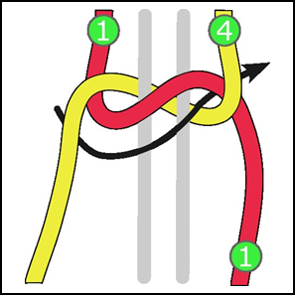
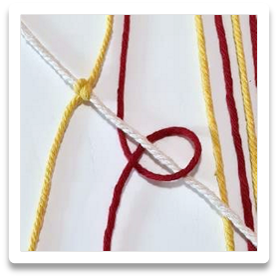
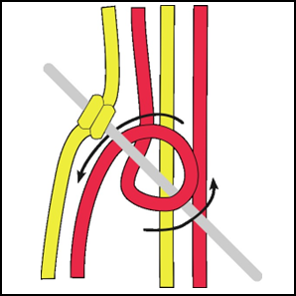
Last month I found some time to revise my knot guide graphics. To ensure the knot guides in my patterns are crystal clear I have drawn them instead of the old method of photographing the various stages of tying the knots. Here a 2 examples from the square knot and half hitch guides.
Old Version New Graphics
I hope you’ll agree the new images are much clearer and I have now included this version of the knot guides on my website and in the PDF pattern downloads available on my website and Etsy shop.
How I created the graphics
I used Inkscape to create the drawings. It is a free version of drawing software with much of the power and functionality of Adobe Illustrator. You can find out more about how to download and use Inkscape at www.inkscape.org

Generate rope pattern along a path
I have used 2 illustration techniques in my patterns. The first is more detailed and involves creating a rope effect. You start by drawing the path of the cords in the knot as Bezier curves. You then draw a single segment like the one opposite and then generate along the path using this pattern.
There is a nice easy to follow tutorial by Marco Riva in YouTube.
This allows you to create a rope effect as shown below where I have used it to illustrate a braided border design.

This gives a realistic twisted rope effect, but there are 3 main drawbacks to this method.
It is quite complex and so not easy to adjust the path (curves) once you have applied the rope pattern.
Layering the intersections so the cords appear to cross in front or behind each other is difficult especially there the knots are tightened, and the rope segment shape needs to be distorted.
Because of the detailed effect it is harder to see how the knot is formed and is less clear than a simpler, more cartoon-like drawing.
Simple cartoon rope
This method is easier and quicker to create. It still involves creating Bezier paths and then generating along the path but this time using a simple rectangle shape to give a smoother simpler curve. This curve can be manipulated once drawn as there are no 'rope segments' to distort or shift out of place. So paths can be copied and reshaped, saving lots of time over the rope effect method.

Because the illustrations created using both methods are 2D drawings they have no real concept of the cords passing in front or behind each other in 3 dimensions. So there is quite a lot of touching up to do once the core paths are in place. But this is much easier to do using the simple cartoon method. Every intersection of 2 cords needs examining and where necessary simple masks (blocks of colour or border lines) are applied to give the illusion of passing in front or behind. It takes time and care but hopefully the final effect looks smooth and simple and most of all, easy to understand how the knot is tied.
Feedback request
I plan to make further enhancements to my website next month, and to help me make the right changes. I would be very grateful for any feedback you may have about my website, both good and bad, especially bad. If you can spare a few minutes to take a look at my website and then leave some feedback or suggestions for things you would like to see included or changed. Submit a comment on the contact form or email me info@butonestring.com
Many thanks.


Comments